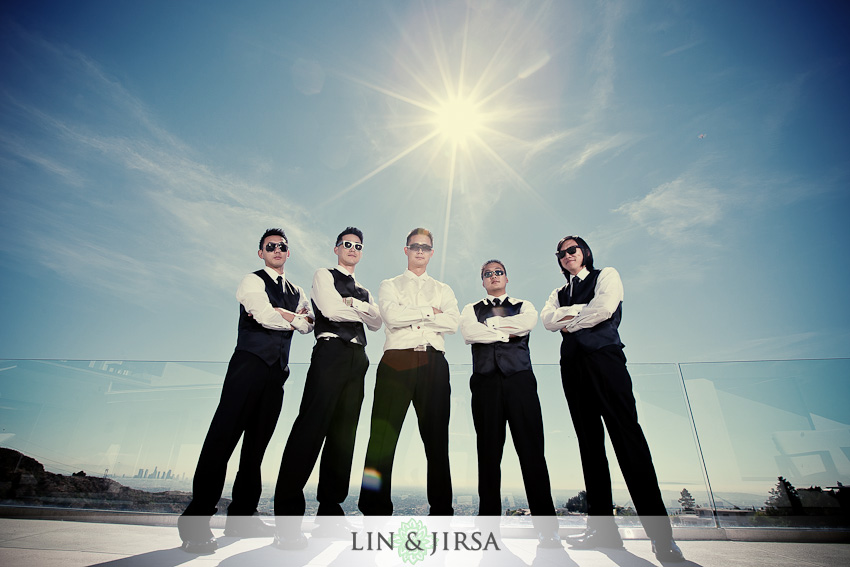
Starburst effects can add an interesting element to a photograph. In a dark, moody scene, it can add a dreamy, peaceful twinkle to the lights. In a daytime scene, a starburst effect from the sun can add drama and interest to otherwise uneventful skies.
Starburst Filters
- glass filters with a grid on the surface that created the “starburst” effect.
- these filters created interesting starbursts, and also caused a rainbow-like effect in the light called dispersion as well as softness issues in the images
Diffraction and Starbursts Defined
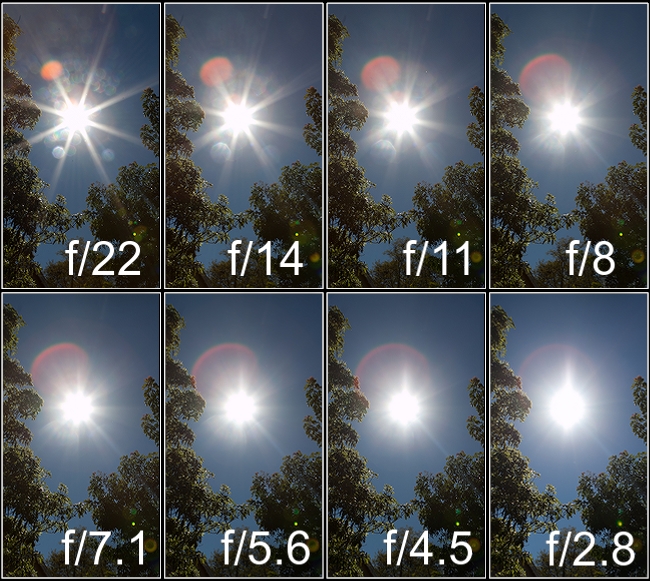
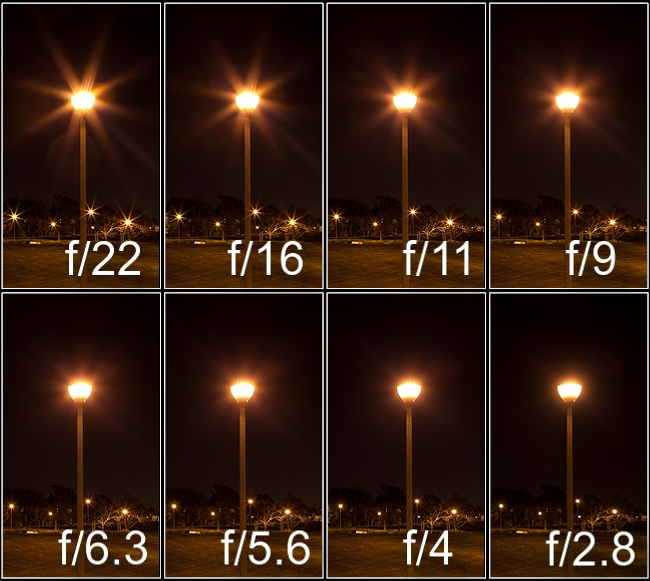
- Diffraction is the slight bending of (light) waves around small obstacles and the spreading out of (light) waves past small openings.
- a small aperture at a low focal length, it bends around the edges of the blades and creates the “star” look.
- The following charts show the effect of aperture on the size of the starbursts.
Night Time Starburst Tutorial
1) Use a Tripod and Remote Trigger
- At such small apertures and such low light, you’re not going to get a crisp handheld shot, so you’ll need a tripod and a remote trigger
- Any sturdy tripod will work, as will any reliable remote trigger.
- If you don’t have either of these, you might be able to get away with setting your camera on a solid object and using the two second timer, however your composition options would be limited.
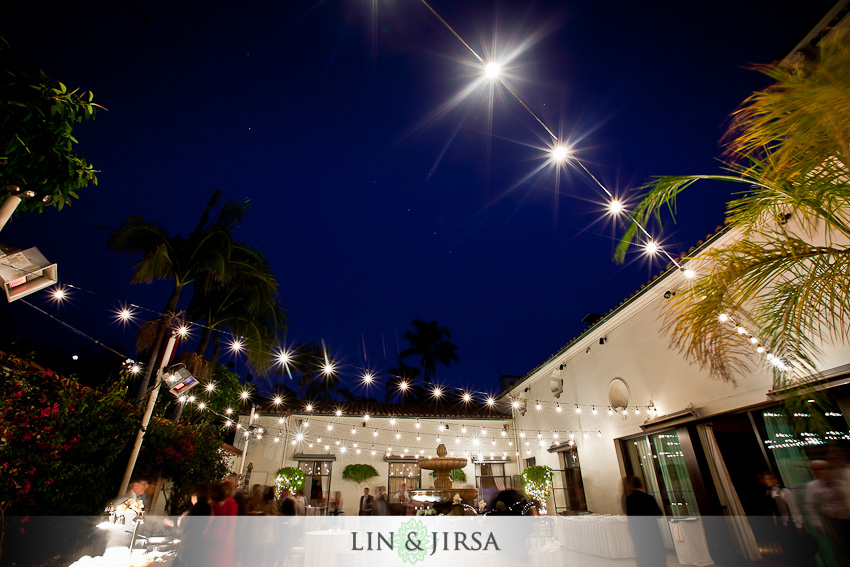
- use a small aperture of f/11 or smaller.
- The smaller you make your aperture, the more diffraction you’ll get and the more “starburst” you’ll see in your image.
- the lower your focal length, the smaller the physical opening of the aperture
3) Turn on Your Highlight Alert
- Most digital cameras have a highlight alert option that will show you when your highlights are blown out.
- This is important to turn on because you want to see if you’re blowing out, i.e. losing unrecoverable detail, in any parts of your image.
4) Set your Focus
- For wide landscape and cityscape scenes, you’ll likely be at infinity.
- switch your focus to Manual on the lens to ensure that your camera doesn’t auto focus to the wrong plane.
- As you use your remote trigger to take the picture, make sure you don’t bump your tripod while the shutter is open.
- unless you’re really experienced , that first image likely won’t come out exactly as desired, so just adjust and repeat until you get it.
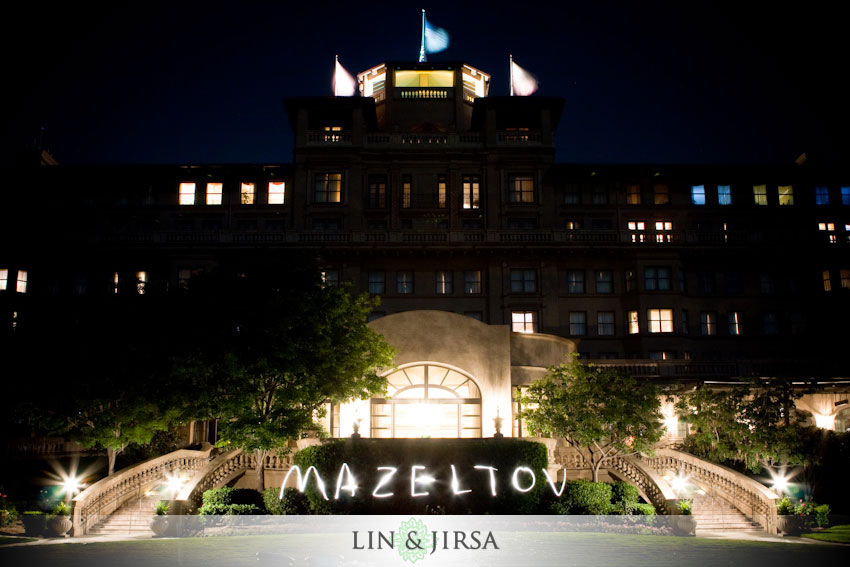
- Consider applying additional techniques such as light writing
Day Time Starburst Tutorial
- “Starbursts” from the sun use the exact same concepts as starbursts at night.
- The main issue you’ll face is that, in the day time, you’re shooting into the light and the sun is likely much brighter than your subjects.
- In this case, you’ll have to use another light source, most likely external flash, to light your subjects or the foreground objects so they’re not underexposed.
1) Turn on Your Highlight Alert
- this is important to see where you’re losing detail and overexposing the scene.
- a little underexposure, especially at ISO 50 is going to still work out great.
- ISO is going to be as low as you can go
- shutter speed is likely going to be at 1/200, as high as it can go while still syncing with external flashes.
- Your aperture will vary depending on the amount of light, the amount of “starburst” you want, and the amount of light you’re able to get onto your subject from your flashes or reflectors to properly expose them.
- be on Full Manual Mode for this one
- You’re going to need a couple of powerful external flashes.
- You’ll also need another type of remote trigger for your flash.
- You can choose how you want to angle the flashes and experiment with different distances and zooms of the Flashes until you get your desired look.
- Take your time, adjust your settings, adjust your flashes, and keep trying until you get exactly what you want.
http://www.slrlounge.com/diffraction-aperture-and-starburst-effects
No comments:
Post a Comment